Friday, April 27, 2007
sanding start
{{{Toots and the Maytals, Funky Kingston.}}} (cheers Steve Thornley!)
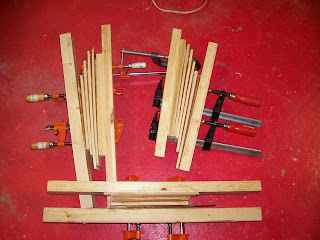
I'm doing much of what's in the above picture so I haven't made many posts.
After I got the nose and tail blocks good and dry I cut a rough outline of the rail with my jigsaw. My tail block extends back about 3/4" further than what I think is supposed to be the original length. With this in mind, I'm going to make it a rounded squash giving it a little more meat on the end. Why? Just for experimentings sake really. I mean, it's only a half to threequarters an inch and isn't going to drastically change the outline. I'm thinking that if I'm making a little sharper of a rail at the tail for those kind of skating maneuverings that will eliminate some longboarding style surfing, and if I give that style of tail (squash) I can add a little rounded volume to it, and I can recover a small element of the longboarding style that I have giving up with the sharper rails. I think that with this small modification and with a hatchet fin, I can recover noseridability lost with it's larger rocker, sharper rails and squash tail. Personally, I think this shape a great candidate for side bites too. It has a distinctly thruster tail. What is good about that for me is that the thruster tail is the one that I am most familiar with and is a loth easier for me to tackle than a swallow or rounded pin.
There are a few soft spots on the deck. Totally minor one on the nose seam about two inches long. And a soft spot at the tail. I am considering two layers of 6 pound glass on the deck with even maybe a deck patch at the tail and one 6 pound layer for the hull. I guess I better go shop for resin and glass!
Back to more sanding! Thanks for dropping by!
Friday, April 20, 2007
NoseBlocks
Tuesday, April 17, 2007
Tail block
I got the tail block glued on. They better kill another horse because I am all out of glue. AND I am broke and out of money. Wilbur kindly donated me with about 30 pounds of seafood to keep me going. Thanks Bro! I hope your move is going well. All your hard work is going to pay off someday in the shape of a 32 foot sailing vessel I'm sure. I'll be there for that long trip around the horn making stops along the way all the way to Hatteras with quite a long furlo in the Caribbean!
Not much time to spend on the board until Thursday anyway. Maybe I'll try and fit in some nose block glueing before then so i can just chip away at them and not have to wait for the glue to dry.
And then Shaping! I'm stoked because I was worried that the frame being tweeked a bit when I first glued it to the bottom planks would mess with the shape, but the lines are looking smooth and no unexpected twists in her or anything so far! I got lucky!
Well, I'm thinking that one cross member that was a bit off by an eigth of an inch or so did not mess with the overall shape because I didn't push the cove and bead strips up against the one side of it that had the gap and I filled that gap in with little wedges of wood and glue filling the gap. Ultimately the board may be slightly wider at that X member before shaping, but it won't be anything that I can notice at this point or for a long time. Besides, the board being a quarter inch wider will be THAT much more stable for my low center of gravity surface assault upon the unsuspecting ocean gods. Is there a local PNW ocean god like how European waters have Lir and the Mediterannean has Neptune?
Friday, April 13, 2007
Shaping!
I started some shaping preliminaries on this lovely Friday the 13th. First on the list was to pull out the flower print trunks in which to shape in as all the good shapers wear them my close freind and partner in crime Surfmaster Dave told me. Well, I'm too fat and had to go with the tartan plaid boxers and moccasins look. No shirt of course.
The above pic is the board just off of the rocker table.
First thing I did in my boxers was to anchor the saw horses to the concrete, so I bought concrete anchors and a drill bit from HOME DESPOT (unfortunately) and secured the perimeter. 30 minutes and 15 more bucks.
{{Peter Gabriel, Biko}}
The above pic is just the rough shaping of the rails done with a Stanley Plane. Worked really well. On downward curves plane down, if you plane up you go against the grain. I brought the edge right up to the outside of the first cove and bead strip. I ripped through this pretty quick at 30 minutes.
In this pic you can see how much rocker the board has. It is a bit more high performance than a log and not a likely nose rider as the tail has a double concave on either side of the fin box so I'm basically going to shape my rails soft and rounded up at the nose and bring it back to a fairly hard and sharp rail at the tail. Not overly hard though. There is a concave in the nose and may be nose ridable So I'm thinking to make the rail gradually get harder at about 2 foot from the tail. Round most of the way forward.
{{Jerry Garcia Acoustic Band}}
Here I glued up some nose and tail blocks. No one every accused me of knowing what I was doing, but I think I got it down. I was going to make the nose blocks rather large (about 4" at their thickest point) but that may prove to be too heavy. We'll see, I glued up plenty of leftover scraps and redwood shingles to give it sort of wedgy kind of look. This took an hour and a half.
Here you can see a triangle that I squared off the nose and was thinking of cutting all that off forward of the hypothenuse (Pythagreous would kill me for such slander). Well you can see that it is a rather beefy portion of the board, but I was hoping to cover up a mistake on the deck at the nose where I cut too much of the top blanks off. But this might look like even worse crap AND weigh too much. We'll see...
2.5 hours today
and 15 bucks more.
Kurt Vonnegut passes on
http://www.nytimes.com/2007/04/11/books/11cnd-vonnegut.html?_r=4&hp&oref=slogin&oref=slogin&oref=slogin&oref=slogin
Tuesday, April 10, 2007
Lighting
On the topic of lighting, I cannot stress how important it is! I have four flourescent "shop light" fixtures. That's 8 four foot tubes. Really it's fine, but personally, I would like more so I can see angles, flats, curves, hills and valleys better. The point that I am at now with shaping the rails and such is going to be really tough withougt enough lighting. When I used to dabble in shaping living with the folks back in Philly I used to hang whatever flourescent lights that I could find from the ceiling down low at rail level or attach them to the walls at rail height just like most shapers do in their shacks. You really can see any deformities much easier with a lot of lighting. Of course the hippie in me suggests flourescent as after they have warmed up are tons more effiecient than incandescents. You're wallet will thank you too.
Personally, I like flourescents better for this sort of thing. If I'm at home reading or on the PC, I like the color of incandescents as they are warmer, but for working, I like cool or warm white flourescents. Cool whites are slightly blue and for scientific reasons unknown to me preferred by shapers as well as blue as a backdrop for eyeing up the rails, etc...
I have some experience with varnish, laquer, polyester resins of all kinds and polishing them up. Usually I've always done them in a semi dusty environment, but the environment that I am going to do this in now is extremely dusty and I have a dark forboding about having to wire wool out a million dust particles.
One tip I received somewhere on dust is lighting related. I understand that flourescents emit electromagnetic radiation in the form of negative ions and that they attract the positive ion dust particles, so if one is glassing (etc...) to leave the lights on so those particles don't drop off the lights on to your work.
Maybe I'll clean up those tubes beforehand so they have some extra attraction to the dust. Maybe it will work better.
Does anyone have any more dust elimination ideas?