Sunday, April 1, 2012

Finished Brass Air Valve and Leashplug (please don't kill me)

I got the final pieces for your viewing pleasure!  This was a successful experiment on doing these at home!  Without a machine called a Terret Lathe it is a bit more involved and they have a little bit more of that DIY air about them, but they are quite attractive and passed all the tests from my QA/QC department (my Uncles lips blowing through them).  Good times!

I did two styles of the valve.  A flat top valve if the builder wants to countersink the whole valve into his watercraft so it is flush with the surface and a valve with a radius (rounded top edge) for the builder who wants to place the valve slightly above the surface of the fiber-glassed board.

The leash-plug is just this one style in this batch, but I am going to design one with the lip a wee bit higher so it can be mounted from underneath a 1/4" board and be flush.  These can be mounted that way, just a spacer of sorts needs to be placed on the valve or the board somehow, which is relatively easy.  Or these can be mounted by boring a hole through the top like they have been in the past.

Check them out!


Friday, March 30, 2012

Brass Valve Stems! {Attack of the Killer Mutante Skateboarding Vampire Valve Stem People}

I promise this is the last post of the Valve Stems.  I did some work slotting the tops, chamfering the threads at the O-ring seat so they don't eat up the threads and polishing the whole valve stems to get a superior product that won't leak!

I will post the pics, they are mostly self explanatory. It turned out really well and we are both pretty happy with it! 

In the morning that stained glass window that I hung looks pretty cool!  The pic doesn't do it justice!
 Starting the slot cut.
 Part way through the cut.
 All the way through the cut
Adding a 45 degree chamfer to the top of the threads so that the threads do not tear up the O-ring.
Some of the Stems deburred and polished by my Uncle Rich.

We actually are thinking of building a tumbler to tumble the parts to deburr and polish them because it's pretty tough doing it all by hand.  If there is a need, it might be a good idea.  I'd like to sell these and am going to put an advertisement in Woodenboat Magazine as well as Surfer Mag.  Who knows, right?  Hey, have a great weekend!  Philly weather looks pretty good for fiberglassing on Sunday, so I will most likely have a post then about fiberglassing the canoe!  See Ya!

Monday, March 26, 2012

Tired of Brass Valve Stem posts?

Yeah, well I have another!  A couple of goofs were made but nothing major and are, hopefully, easily corrected. One was a seat that we cut at the top of the threads (base of the head) for the O-ring to sit in.  Hopefully a heavier O-ring of the same o.d. will fix that or I will be making new ones altogether.  This valve can't leak, if it does it spells disaster for a hollow wooden board!  The other was we just cut the head size too big.  Easily fixed.

First my dad made a seat that is held by the jaws of the lathe for the screws to screw into and be held while the head is cut.  Then


I cut the head to 5/16" (312/1000's) when they actually needed to be 1/4" (250/1000's) so after they were all cut, I just cut them again.  Not a problem.  So cutting the head down to size you cut bits off at a time and measure with Verneer Calipers in various ways.  Below I am using the depth gauge end of these really nice verneers that have a dial on them.  Quite easy to read!  My first reading is 44/1000's too big and the second is spot on at 312/1000's which is equal to 5/16's of an inch.  Of course, after all was done, I had to bring them down to 250/1000's -or- 1/4".

Here is the fatal flaw that we can hopefully remedy, the O-ring seat that was never meant to be!
And finally here is my dad setting up to put the slot in the threads, but I didn't get any pics of that as I didn't think about it while I was running the lathe. 

I'm promise that there will be another post about the valve stems!  Stay tuned!  Don't miss it!


Sunday, March 25, 2012

Brass Air Valve Stems

Today my pop set me up on making the brass air vent stem part.  It's basically a screw with a slot running up the threads with an O-ring at its base so that when it is loosened on the surfboard or paddleboard it will release the air pressure inside of the board.

Starting with 1/2 inch (500/1000's) stock brass we cut the pieces at 7/8's of an inch as the final product will be 3/4".  This give some margin for error and chucking the pieces in the lathe easier.  The part is then put on the lathe set on high speed and the threaded part needs to be 3/8" (375/1000's) wide and 1/2" long.  So that is cut on the piece before it is threaded.


Then the part is threaded with the lathe set on slow speed and shut off so it stops spinning just as the threading die reaches the head of screw. 

And there you have it!

A bunch of these were made by me today.  Fun stuff with dad!

Thursday, March 22, 2012

Leash Plugs, Sanding, and World Class Bullhead Catfish

I started the day off today getting up in the wee hours of the morning to go fishing on the Delaware on my brothers boat.  We thought that since the water temperature was rising so fast and is at the magic number while the tide was perfect AND it was the New Moon (mammas lay egg time) that the Striped Bass would be jumping in the boat!  Nope!  It is one New Moon too early even though the rest is right.  We hope that the water isn't already 80 degrees by the next one!  We landed channel catties, but the prize of the day goes to the 3lb. Bullhead that I pulled in.  The Delaware record is something like 4lbs. Keith says, so we felt good about that.  It gave a nice fight!  Gorgeous fish with lots of colour.

We got back in time enough to where I could get a full days of work in as well, so that is cool.  I got the leash plugs set up on the mill and drilled the pin holes in them.  Setting up is the toughest, but my dad is my coach and it is good to learn more from him.  He walks me through the set ups and sends me on my way.  It only took a short while so I had enough time to sand out the varnish job that I did yesterday spraying.  I'm going to go back to brushing as it is faster for me and I do a much better job now without leaving any brush strokes.  Spraying looks nicer, when my uncle does it!  He's not around because he's playing in the nice weather and I have to get the varnishing done as it is such a long process and the varnish once open in the can starts to skin up and that is another variable to deal with.  The lid actually popped off my can in the heat yesterday as well so I have to get another can at the Home Despot because the lid won't go back on proper.

Here is a pic of the drilling process.  Have a great weekend everyone!  I think I will enjoy a nice cold homebrew ESB tonight!  Just one (26 ouncer).  ha ha


Wednesday, March 21, 2012

More Varnishing

I did another coat on "the Rainstick" today.  It wasn't easy and I made some errors.  My Uncle wasn't with me today, but that is good because I actually did it all myself and learned a lot.  I used to do a little airbrushing when it first became popular in the mid 80's so I kind of know my way around the tools a little bit, but an airbrush and a paint gun are  like comparing a die and a Rubiks Cube in complexity.  I've used rattle cans about a million times and am really good at that so in an hour when the mist settles I will go see what havoc I have wrought to my "Rainstick". 

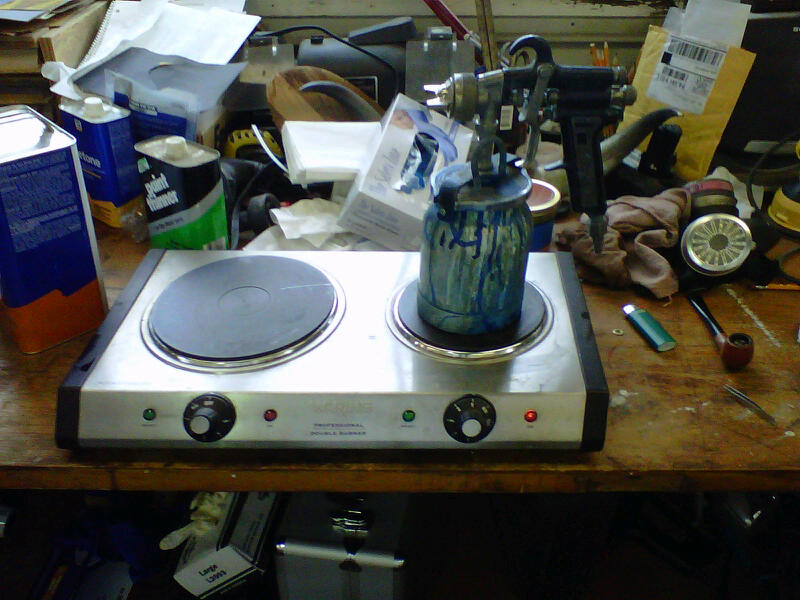
I first got the varnish ready with my mixing, heating and placing in the gun.  I learned some tricks here and there and if you are interested in learning spray varnishing send me a note, there are lots of little tidbits to it.  The most important:  SAFETY GEAR!  If you notice in the next pic I'm not wearing gloves, that is because I was taking a picture with my phone, my camera battery died.  I had intended on a pic in full gear.  All this gear is totally essential because the job is NASTY even with low VOC varnish like I was using.

My first mistake was very silly.  I had sprayed my first pass with the gun over top the board (very novice-like) and the lid wasn't sealed all the way leaving drips along my path on the board!  I wiped them as best I could, but in the meantime all the extra moving around may have kicked up dust.  We will see.  I feel that I did a half decent job for going blind once my goggles were misted up with varnish!  I don't want to look at it yet as there is still a fog in there and it sticks to my glasses lenses and is really tough to remove.

Have a great day!

Tuesday, March 20, 2012

Brass Leash Plugs

I Milled more brass leash plugs again today.  Tomorrow I drill holes and put in the stainless leash posts and they are DONE!  Looking good!