Sunday, April 22, 2012

Happy Birthday Wood Water Crafts, AND Happy Earth Day! Port Side Inner Gunwale


Hi World Wide Web!  It's good to see you!  I was talking with friends last night at a party about this blog, well, actually they brought it up and said how much they liked it, which was great to hear!  Thanks everyone!  Ya know, it's funny, I was telling them, that there are readers in Russia, Germany, the UK and all over the world reading this blog according to my statistical data for the blog and I find that to be very interesting.  The cynic in me thinks that I'm just getting hacked by outsiders, but my friends helped me realize that I might actually have an audience other than family, friends and acquaintances.  So for everyone I have a boat load of posts today to make up for the last week in which I was pretty busy starting with volunteering for 3 gigs Friday, Sat, and Sunday with picking up some free lumber down round the Art Museum way on Saturday afternoon after helping pick up trash on Torresdale Ave. for an organization geared at revitalizing that area.

Below are some much needed pictures of the status of the canoe.  We all worked together to get the port side inner gunwale in.  I had some cleaning up to do so my dad started without me and here he is starting the fitting of the gunwale just like the previous time when we drew the centerline half way up the gunwale and drew it on the boat itself to use as a gauge of how much needs to be trimmed off the end of the gunwale so she a fits nice!

After my uncle and I showed up we all pitched in with the project.  Below you see my Uncle Rich showing my dad the proper way to use a Japanese pull saw.  We get along so well can't you just tell from the look on my dads' face?  Ha ha ha.  Good times!
After numerous times cutting and fitting, eventually the gunwale fits nice and snug and then is prepped for gluing in place with epoxy.  Prepping involves sanding the surface of the canoe in which the gunwale is going to be glued to.  You have to sand off all the high spots from drips and such so that the gunwale is tight against the surface.  If you don't do this, you can get some gaps in which you may be able to see light shine through which can look crappy to the trained eye.  Another remedy for that is to put sawdust in the epoxy when you mix it up which will block the light.  You mix the epoxy, and paint it on both surfaces, the canoe and the gunwale and clamp in place!  While clamping you are trying to adjust the gunwale up and down so that it has a flowing look to it called "fairing".  If it is fair there won't be hills and valleys in it if you look down the length of it.  You are also going to have lots of rags standing by to wipe up the drips because sanding them off later will suck eggz!
The guys are cleaning up while I double check if everything looks fair and true.
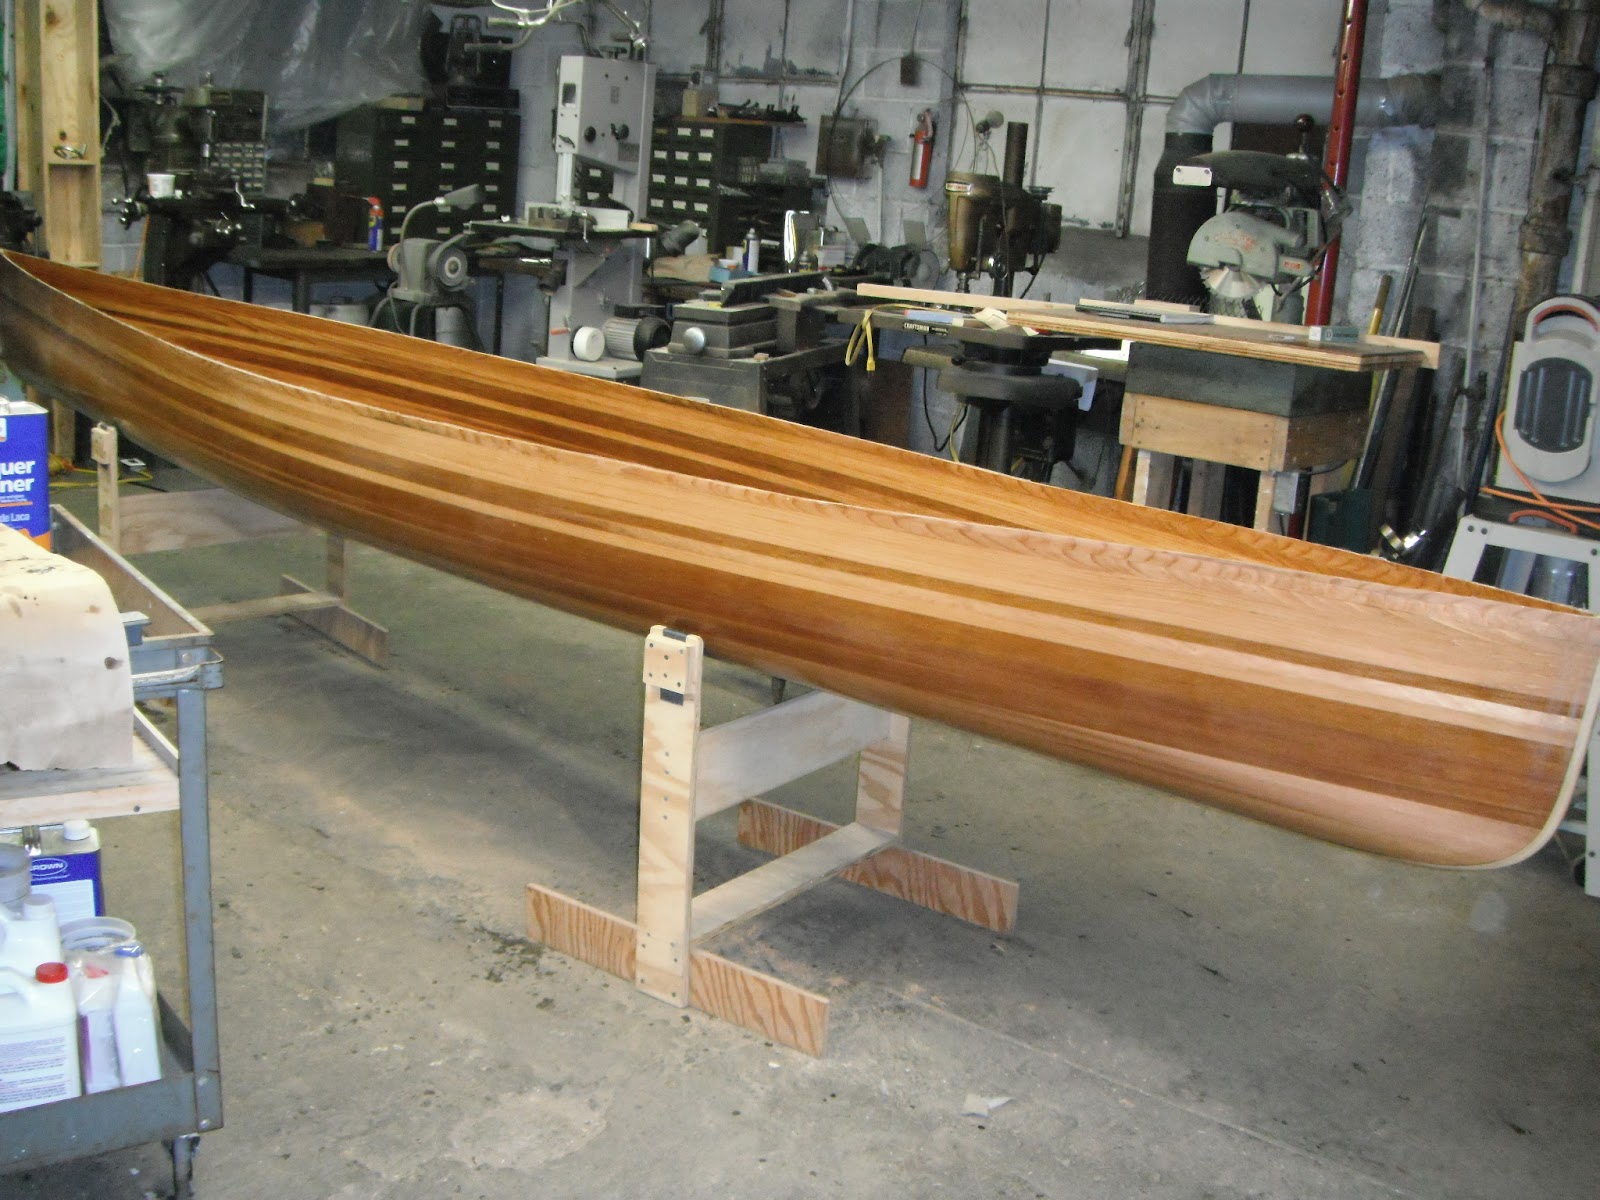
Here she is a few days after the epoxy has fully cured.  You must wait a few days at least in 70 degree weather because sometimes if it isn't cured, all the pressure for the wood curving side to side and up and down my "pop" the gunwale out of place.  At this point it's not screwed in yet, just glued.
I hope you had an enjoyable read and that your Earth Day was Wonderful.  It is the one year anniversary of the official start of Wood Water Crafts!

Wednesday, April 11, 2012

Philly Beer Geek (Verbose dissertation on my life and beer)

Last evening was the Lucky 13 Homebrew Clubs' monthly meeting at the Grey Lodge on Frankford Ave here in the great Northeast.  ***Skip to the last 4 paragraphs to avoid the dissertation****

Before I get into that I have to say something about Philadelphia.  I often get down on this city for it's lack of beauty and general nonchalance or perceived malaise towards others.  I can't compare things like waterfalls on the beach in Oregon to anything in Philly and few things in PA come close to that for that fact.  Fresh air and room to breathe it in may be two other comparisons that I feel are unbalanced. 

But last night I had an epiphany thanks to my friends that I have made in the brew club and also from all those around me who struggle in this neighborhood.  I'm finding out that I have had my proverbial head up my rear-end about how great Oregon is that I was blocking out all that I had known before about Philly that I would actually brag about to Oregonians about what Philly has to offer and what it can offer.  The list is long, but Philly's history is incontrovertible.  You can't argue that at all.  History is spoken to us in the city's architecture, which I feel needs a booster shot, but it's still there to be enjoyed and studied.  I just feel it needs more care before it disappears.  But this city not only has history founded in government and the nations' founding fathers but also in recreation.  For example Fishtown was the nation's first suburb and Philadelphia at it's beginnings was rooted in the culture of BEER.  Last night thanks to something that Steve Hawk (Philly Beer Geek 2010) and Carolyn Smagalski "The Beer Fox" alluded to made me open my eyes.  As they talked to us about Philly Beer Week and the Philly Beer Geek events I got pensive.  Of course, I had a few pints to help the creativity flow, but I was illuminated to the fact that not only is Philly's past steeped in brewing, craft brewing, and home brewing but it is in the present as well and is constantly boiling over with enthusiasm about the future.  I finally realized that all these west coast "beer towns" really are playing second fiddle to Philly.  I in no way am trying to put them down in any respect.  They are great places with multitudes of great beers, perhaps more than the Philly Area, and maybe better!  Who knows?  Everyone has different tastes and "better" is really only up to you the reader/beer drinker.  Philadelphia and it's surrounding neighbors have their place in beer history that none other have.  That cannot be denied.  In that, I think Philly needs to use it's history to pry itself into the future with such things as waterfront revitalization projects including the building the ship that William Penn sailed on as an attraction at Penn's Landing.  I personally feel it's not only local pride that should support this great city, but national pride as well!  I sent many a proposal to two Presidents of the United States over the years decreeing just that.  This local craft beer movement in Philly could be construed as pride in the nation when looked at the idea from this vantage.

I'm a big fan of BEER even though my beginnings with it were not on good grounds.  In high school I didn't drink it.  Many of my friends did.  I had fun anyway.  They were good times and I can't remember anything that ever happened being bad because of it.  I just didn't do it.  College changed my mind a bit.  It was a time of very large frat parties and GDI (non-frat) parties when I was introduced to Piels.  Rows and Rows of 17 dollar kegs of Piels.  I did NOT like Piels, but I did decide to have some.  I can still taste it now that I recollect.  It wasn't pleasant and hence the necessity to "shotgun" cans of beer or chug it as fast as you could because it was like carbonated corn flavored water!

So during my college years I was in upstate Pennsylvania while in session and during the summers I was living at the beach in Ocean City, MD.  Neither place had good beer, they did have rum though!  I often opted for spiced rum in those days until later in my college career when I found myself at Penn State's main campus at what I learned was called a "microbrewery".  It's still there from what I understand.  The name escapes me and I can't find a name to attach to a microbrewery open in the early 90's in State College, PA.  About 6 friends and I read the descriptions of the beers that they had and we all decided on getting pitchers of the Porter.  "Four pitchers of Porter, Please!"  I smelled the first beer that I ever saw served in a pint.  I floated away on it's roasted aroma and took my first hearty sip.  I had found my true love!  EVERYONE else hated it.  They were soon to order their old stand-by's and I was to have 4 pitchers of Porter to myself! What a night!

So now I knew what beer was really like and how it was supposed to be!  But I had no idea where to get it.  I happened upon a downtown bar in Philly sometime later called Sugar Mom's.  I think it is still there.  It was a really neat former sugar warehouse with the kind of ambiance that I like in a hang out. I didn't get to go there as often as I liked, but Sugar Mom's had microbrews from all over the country and world, for that matter, in bottle and on tap!  This was the mid 90's and from what I understand the craft beer movement was underway in Philly or more like in full swing, but to someone in the northeast it was out of reach I suppose.  And plus, I have to add, I wasn't that obsessed with beer or drinking for that matter.  I found myself in offbeat places like Khyber Pass on occasion and had the best of times!  The Beach Club in Philly was a huge night club that had reggae bands play that were straight from Jamaica playing in the summer time.  Still, no quality beer! 

Eventually I found myself in Portland, Oregon and unbeknownst to me I was about to find the best beers that I have ever had in my life at that time from breweries on the coast, breweries in the high desert mountains, and local breweries as well.  All with different qualities and attributes that I loved!  It was a great diversity of beer as well as people and I owe it all to a fellow named Don Younger who owned a bar called the Horsebrass Pub.  It was destiny that I ended up there.  It was a local place that I checked out one time with my boss for lunch.  Yeah, I had a boss who took his colleagues for drinks and food for lunch.  Portland was great!  "It was true love, the Horsebrass and me!"  I would soon be tasting beer from all over the world, settling in on one called Bombardier from the UK as my standby.  It was malty and mildly sweet with mellow notes oak maybe and not very hoppy at all.  I was introduced to many styles of beer, tasted most, liked them all, and certainly had my favorites and some that would make me pucker from the hops!

I had brewed with friends since the late 80's but never took it seriously.  Even in Oregon many of my friends brewed beer and wine and I helped them with interest, but not as a hobby.  But for some reason, and I really can't nail it down, the first thing that I purchased when I moved back to Philly was a homebrewing setup from a guy off of Craigslist and started brewing 5 gallon batches of beer.  Mostly extract and specialty grain brewing until this winter when I decided to take that leap into all grain brewing!  I'm glad that I finally did because I don't want to do it any other way now.  It's wicked easy with the right equipement and it's not a very big investment when you compare it with other hobbies out there.  I barely surf anymore because of travel costs and I'm really not all that good!  I'm good enough to have had some really fun sessions in some incredibly beautiful locations though!  So that hobby isn't going anywhere.  It will stay with me.

So, like, I gave you a dissertation on my life leading up to last nights meeting at the Grey Lodge.  The club is fairly new with a small, but eager, membership.   For the first 8 meetings we have had a core of individuals come along to taste each others homebrews and have been blessed with numerous guests all super open and willing to help us along and it's quite cool.  It has shown me that Philly Beer Lovers are a supportive bunch all working together for the good of Philly Craft Beer and it's enjoyment.

Last nights guests were no exception.  We were graced with the presence of Carolyn Smagalski who is journalist and a judge of numerous events around the country and an all around excellent person!  She even knows about the Horsebrass Pub!  Wow!  I am smitten!  She came to talk to us about the upcoming Philly Beer Week and more specifically the Philly Beer Geek competition as the Grey Lodge is going to hold preliminary events for the competition!  We couldn't have been more stoked!  She gave us over to Steve Hawk who competed 3 times and finally won in 2010 to tell us about what we might expect and some really cool experiences that he had while competing like the time he had to perform the answer to the question of how you would propose to your favorite beer in which he had his girlfriend dress up in a bottle of his favorite brew so he could propose to her, she said "yes" for real and then burped in his face!  She's a keeper Steve!  Lucky Sod!

Carolyn then talked with us about how she got involved in beer journalism, her judging experiences, and her ideas on Gluten Free beer in which was very informative to me as I am designing my first beer and it will be gluten free!  So thank you very much Carolyn and Steve!  We are amped for the next meeting when the Philly Beer Geek competition kicks off at the Grey Lodge with local beer trivia with you guys!  It's truly an honor!

I can't say enough about our good natured members either!  Without you guys, all would be for naught!  Lucky 13 Homebrew Club is nothing without your thoughts, your generosity and of course your tasty brewskis!  Thanks guys and thanks to our Lodgemaster Scoats who provides us with the best venue and best menu!  CHOMP!


True Colors (Rainbow Waves of Grain and "Butt" Joining)

Ah, innuendo and double entendre used to scare off the weak stomached in the audience! And you know, it is completely descriptive of carpentry techniques on this project and not at all what you are thinking!  Your response should be something like: "Whew!"

I took some pics today of the cedar with my other camera and they turned out semi-good.  For some reason I just can't capture the true colors (1980's allusion for my friend Foul Weather) of the wood.

I probably am not using the camera on the right settings and in the right light, in which I should spend some time learning to do so, but too much technology can be overwhelming, and even though I am an overwhelming kind of guy, right now I'm content with this.  However, it's frustrating to not be able show you what I mean.

Below is my cell fone picture which actually captures the color better!
This pic below is from my camera, indoors and not close up of the same spot, but the planks on the bottom towards the right are the same planks.  But you can notice the detail of some of the grain!  It's just wicked awesome!


My only complaint is that after these pass through the joiner, they are going to be a half inch narrower and we are going to lose some of this nice grain!  I'm going to have to go easy on the joiner and make fewer passes.  My Uncle and I did two planks on the joiner today.

Here, the first plank went fine:
But we were wobbling the plank all over the place on the second one and rigged up the two following contraptions. 
 I think we may have been over complicating the process...
The purpose of joining the wood planks is to give that side surface, the one that is facing down on the joiner/planer, a completely 90 degree flat surface because these planks are going to be butted up against each other, glued and clamped making a "butt joint".  Of course I will be clamping the heck out of them so the surface can have imperfections.  There is no real need to be overly cautious about the job we are doing.  Now aren't you glad that this post is about carpentry!

So, hey, if you are reading this, drop me a line, let me know if you have ideas or like what I am doing.  Please feel free to contribute by asking questions!  It not only helps you, but me as well!

Have a groovy day!


Tuesday, April 10, 2012

Milling Gorgeous Red Cedar for the LOG

Today I got to mentor my uncle on milling planks and what a joy it was to see these planks blossom!  You cannot believe the amount of different colors in them!  It was cool teaching my uncle about the thickness planer and then to see the wood when it was done was icing on the cake!  We knew when we were cutting and slicing the planks on the band-saw that they were going to be nice, but when we saw them come out of the planer we were ecstatic!  My only regret is that I took pictures with my phone and they didn't do the wood justice out in the sunlight like that.  Tomorrow I will use the better camera and show you what I really mean!

So last year my Dad and I got these 5 x 1 x 14 Eastern Red Cedar planks for back up on the canoe from Medford Cedar Products (a great group of folks that are very helpful and enthusiastic) in case we needed to mill extra strips for the canoe.  We didn't need them so I was actually thinking of making cove and bead strips for the rails of my surfboard with them, but I took a closer look at the grains on them and said "wait a minute here!".  The grain in that wood was nicer than a lot of the grain in the redwood that I have milled for the board.  I knew the grain was nice, but not the color too!  BONUS!  So some of the more boring redwood planks I am going to mill for the cove and bead rail strips which are about 1/4" by 1/4" or so.  I might make them a wee bit bigger.

Below we are cutting the planks in two before we split them.  I would have rather let them stay at 5.5" but splitting them at that width would have been beyond our means.  Cutting them in two lengthwise was no problem, the green featherboard worked great for holding it in place on one side and the fence on the other.  Getting everything square was tough on this saw as it is of poor quality.  If I make a new fence and adaptations to the featherboard I can probably slice a 6" plank and I think that would be worth it!

Below you can see us slicing the plank.  On our first attempt the green featherboard was flush with the table and it barely reached the 3/8" distance from the blade that we needed.  The distance was fine as 3/8 on either side of the blade to split the wood is a perfect 3/4" (3/8 + 3/8 = 6/8,  6/8 divided by 2 = 3/4) so we just made it by the skin of our teeth on that one, but because the featherboard was flush with the table the plank tended to tilt to that side at the top not giving us a perfect 90 degree angle.  What we had to do was either double the featherboard up with an identical one with longer screws like some are capable of doing or add as many washers between the bottom of the featherboard and the table.  That was our only option and we were only able to raise it a 1/2" but it was enough to eliminate the problem.  Voila!
Here are some pics of the planks after they were split.  We flipped when we saw how nice they were!  I regret not having my camera for better pics!

Here we are working the thickness planer.  Basically this machine gives us a really flat surface as we thin the board down from 3/8" to 1/4" as long as you keep the plank from bowing in the middle while planing by dropping or raising either end of the plank.  If this happens it will throw the plank up at the cutting blade in the center and you will get a wavy surface or even worse, blade chatter.
****OK reminder**** Safety gear is necessary at all times.  This machine is especially loud.  Loud doesn't describe it.  It is PIERCING to the ear drums.  I like to wear ear muffs for this one.  Plugs aren't all that great.  This step is also very dusty.  Much more dusty that the band saw and you gotta wear a mask.  Cedar can be very irritating.  I felt a little woosey in the stomach and was sneezing quite a bit with a mask on.  I have a beard and masks are only so effective with beards. 
Here is another look at the grains.  I will edit this post later tomorrow and show you the difference between my cell phone pics and what a real camera looks like because there are literally 7 different colors in this wood ranging from yellow to purple.  It's incredible!!!!
 Have a great day!

Saturday, April 7, 2012

Gunwales and More!


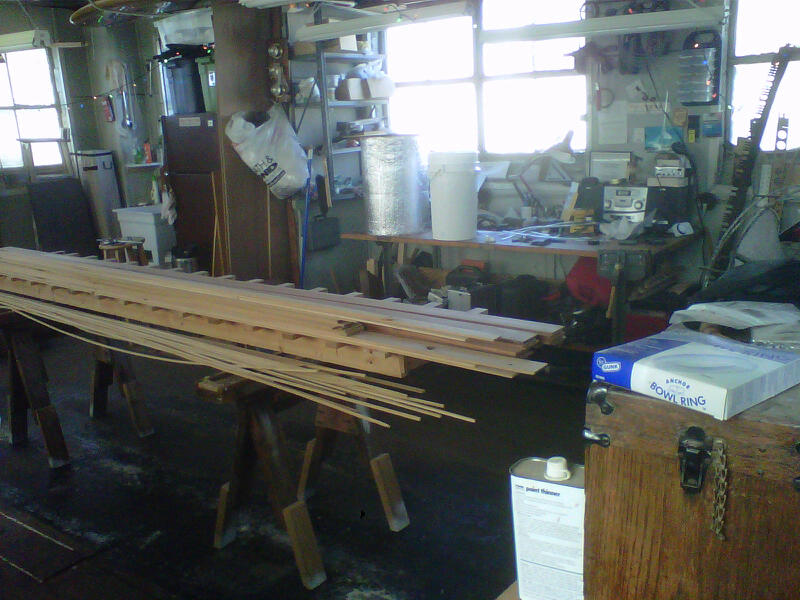
Above you are looking at what lumber I have for my next project.  It's mostly redwood and there are some cedar planks of various shapes and sizes there on the left.  My cove and bead strips are in pretty bad shape and I'm going to have to make more of them.  I'm in need of some dark contrast wood as well.  I might have to make a trip to some lumber yards here and there and see what I can dig up.  The redwood is lacking stunning grain as well and I need to "spruce" things up a bit!  In fact, a spruce pin stripe surrounded by some really dark cedar would be nice!
On the bench in the background is my chocolate porter waiting to either be bottled or kegged.  I'm not sure what to do with it yet.  I probably will keg it.  It was so incredibly clear and yet so black.  It looks delicious!  It's been in the secondary fermenter for well over a month now.  YUM!

OK so onto the canoe project.  My Pop and I are onto the gunwales.  They provide support and rigidity to the canoe as well as a bumper.  The outside gunwale is also called a "Rub Rail" because it serves as protection to the body of the canoe as a whole by rubbing up against an object before the hull does.

We are working on the inside gunwales first.  My dad and I routered out scuppers on the inside gunwales over the winter.  These serve mostly as drains for when water is in the canoe and when you flip the canoe upside down, most of the water drains out easily.  They are also decorative and can serve as places to tie line to to tie down cargo, etc...

At the bow and the stern, we are tapering these down to less than 3/16" over a length of 30 inches.  they are going to 3/16" because the inside stem is 3/8" and two gunwales will be joining up at the stem so you divide 3/8 by two and you get 3/16!
The gunwales are Oak.  A hardwood.  The Oak is harder than the cedar hull and serves as protection against scrapes, etc...  Above and below you see the tools that we used to work the wood down to the taper line.  Oak is a tough momma!  Using the handplane is difficult so the fine work was left to my sanding plane.
Below you can see the original line and how fine and flat the sander can get.  This takes a little practice, but after a few times a novice can achieve great results with a little diligence.
Below my Dad is using a "Rat Tail" file with sandpaper wrapped around it to sand the insides of the scuppers.  The file is tapered like a rats tail and can achieve many different size radiuses.  The router sometimes leaves imperfections or burn marks and he is using a coarse grade sandpaper to eliminate them.
When he was done, I came along and sanded the scuppers with a finer grade sandpaper to remove any of the scratches the coarse paper leaves.  This step pretty much has the wood ready for varnish or whatever finish may be desired.
The outside edges of the gunwales needed to be rounded off so we got out the router with a 1/8" radius bit and rounded the edges. We did some final sanding with super fine grip paper and started the mounting process which entailed lining up the centerline which was drawn on the gunwale long ago when we put in the scuppers so we could line the scuppers up equally on each side of the boat, port and starboard.
Below is the centerline of the canoe's top edge.  

I didn't take pictures of the process as we were kind of busy, but I will see if I can walk you through it.  What we did was place the gunwale on the inside of the canoe and line the centerline of it up with that of the canoes' and clamped it into place.  Now, the gunwale is longer than the inside length of the canoe so we gingerly clamped it in place moving forward of the centerline clamp until we got about 24" from the bow with the gunwale over top of the bow.  Next we draw a line matching the angles of the bow stem going downward and the angle of the bow stem going across with the aid of something called a bevel gauge.  This tool finds the angle of an object and with the turn of the screw locks it in place and the angle can be transferred from one side of your piece to the other easily.


We took the clamps off and cut "proud" of that line with the Japanese Saw, a very sharp fine toothed saw that is perfect for these applications and well worth the money spent on a good one!  Now that the gunwale was cut we placed it back in the boat just as we did before and we look to see if the two centerlines match up.  If you get it the first shot, you are GOOD!  We were a 1/4" off and had to make one more cut and one more fine sanding job before we got it right.  The third time is a charm!  Leaving the bow section clamped in place we then moved aft of the center clamp and clamped towards the stern of the canoe and making our lines with the bevel clamp again and cutting and fitting and cutting and fitting and sanding.  It can be an intensive process and can take some time.  The stern took us about 20 minutes to get it to fit, but it fit nicely!

And finally the surfaces of the areas to be epoxied were sanded and epoxy applied lightly to glue it in place with a multitude of clamps to keep the two surfaces nicely joined.


Below you can see just how many clamps were used and the makeshift "thwart" in the center to help keep the shape of the canoe constant.  "She's a beaut Clark!"
My Mom doesn't want us to work on Easter, but I have to plane and join some planks with my dad, it's best done with two people.  He's a good sport about it and I am really glad that I have him around to help me on my projects!  I suppose he's glad I am there to help with his canoe!  It's all good!  Happy Easter!

Wednesday, April 4, 2012

Fiberglassing Freedom Made Fun

Hello blog world!  I need to wiki the word "blog" as it seems an interesting creation.  Then I need to wiki the word "wiki" and see how that was derived!

Anyway, I digress, actually that is not a digression because I hadn't started yet, unless you count the title of the blog as a starting point, and then it was a digression.  But now I truly digress and before you close the page I will start with the real meat of the story.

So, the weather once again is beautiful here in Philly and my dad had off from work so we were able to actually coordinate a nice day to fiberglass the inside of the canoe with days off and we got off to an excellent start!

The first step, always the first step, is to prep the area as clutter tends to build up.  While doing this it's good to chat about what you plan on doing and discovering that you don't have mixing buckets big enough for the job and off to the Home Despot you go killing another 30 minutes!  Which actually gives you more chance to think about what is going to happen next.  Fiberglassing can seem daunting and even frightening.  It is the element of drying time that is most worrisome, but when you are through you realize that it wasn't all that bad and that you will remember more for the next time.

So you bite the bullet and start cutting glass.  Always read your instructions, whether it be off the internet or from books.  I prefer books as you can lay them around the shop for quick reference.  Cutting the glass is half the battle as a lame pair of scissors and not paying attention can damage your pretty cloth.

We laid ours out.  You gotta have two people for it to go smoothly on a canoe of this size.  And then we had three people for applying the epoxy, which was optimal as two can apply the epoxy when you reach the final stages and the third can do the rest of the cutting at the inner stems.

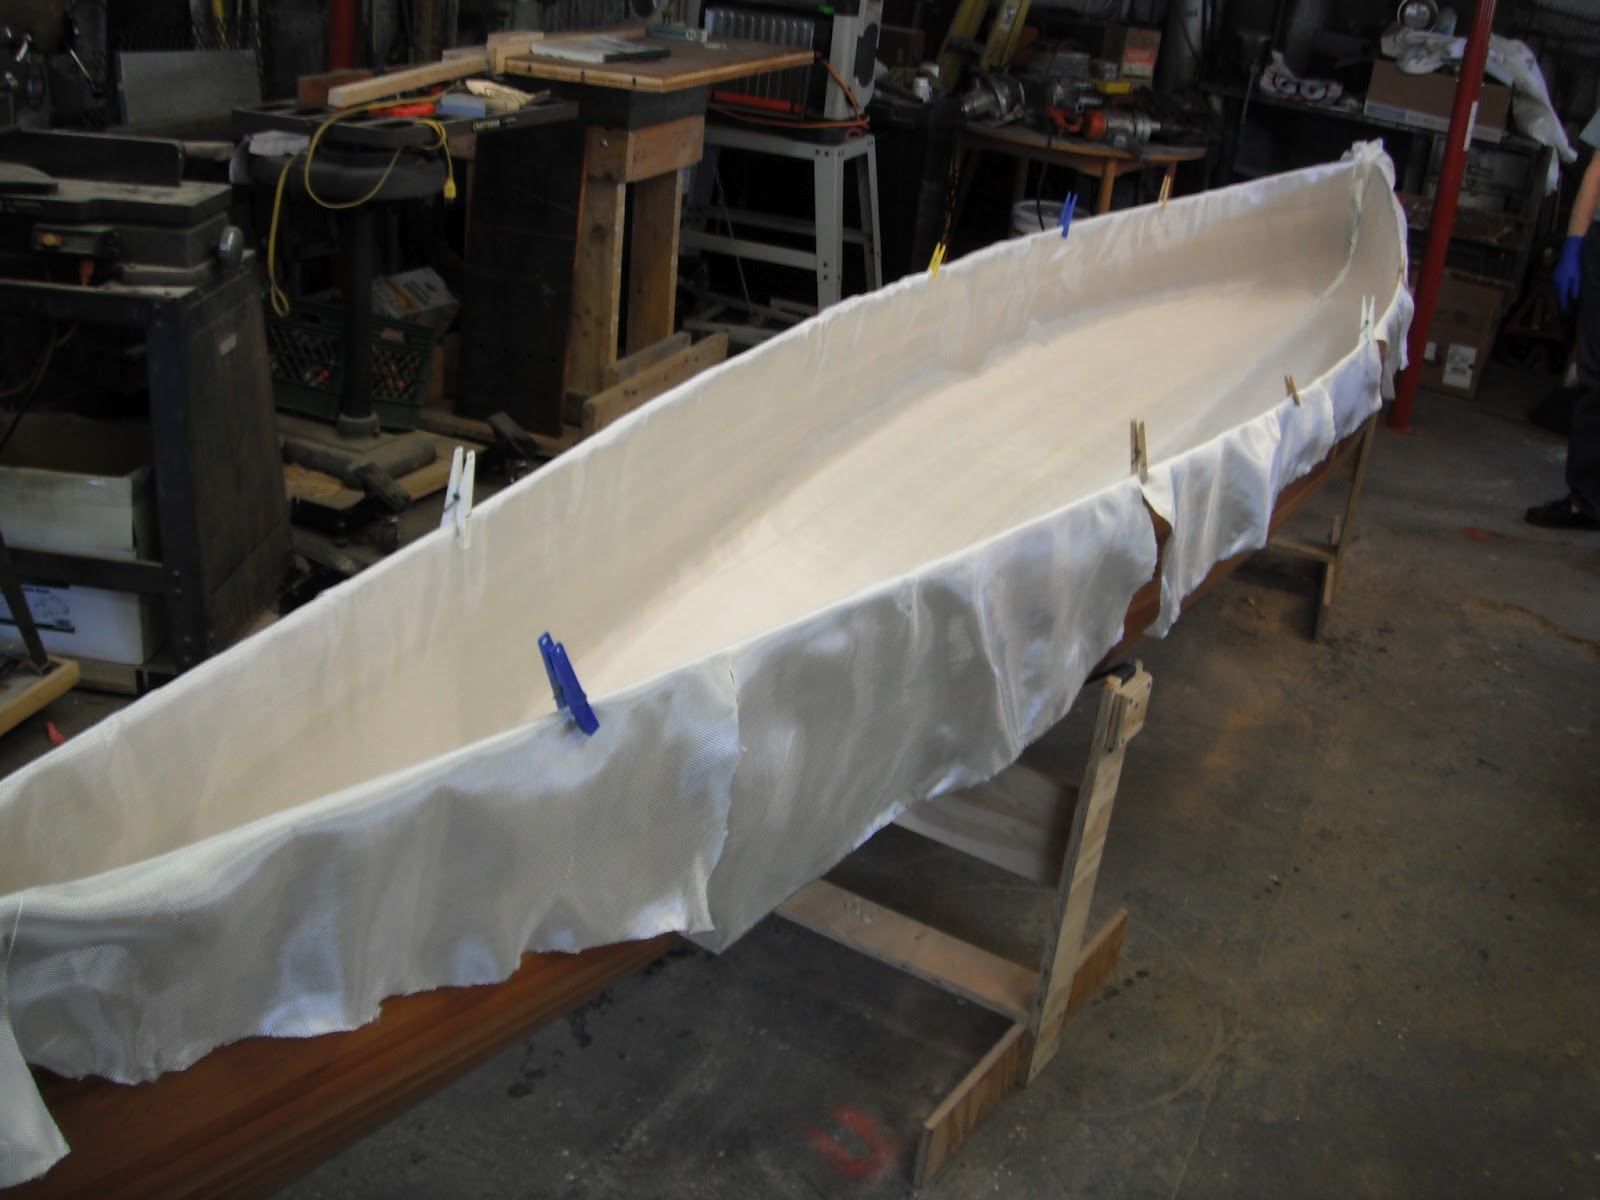
I didn't take pics of each step as the process is messy and moves too fast, to document it you would need a photographer.  But I did get the laying out of the glass;

 You roll out your glass, cut it to length (I always cut big, some instructions say to cut 4" short on either end, but I don't fathom why, I ALWAYS cut big) and a person on each end grabs hold of the corner, lifts the fabric in the air and lowers it neatly into the canoe.  Then it is smoothed out with your hands starting from the bottom and working upwards.  CUT YOUR FINGERNAILS prior to glassing as they can make runs in difficult areas like the stems.  There will be areas around the outside that will need to be sliced to allow folds in the fabric to lay flat and the inner stems will need to be cut along the length of the stem with a "T" at the terminus.  My dad in black is doing that below.  That should only be done after most of the canoe is epoxied so that the glass doesn't shift all around on you while you are trying to be precise with your cuts.  My dad actually marked out where his cuts were going to be with a pencil and then came in with the scissors and used a knife at the terminus of the inner stem.
We mixed up a quart and a half and it was almost enough to do the whole canoe in one batch.  Which I feel is the way to go.  Many manuals tell you to mix multiple small batches as you go.  Once again, I'm not sure why they tell you that as that is what we did on the hull and the differences in times and the mixes themselves led to color variances where each batch ended and the new one began and it does not look as good as it should.  Lines are visible and unfortunate.  This way worked much nicer.  I just needed to mix one more small batch to do the stem areas and I see no color differences this way.  We are Using MAS epoxy and I personally like this one the best.  Granted I have only used a few kinds, but MAS seems to be perfect for what I do.

After the boat is wet with epoxy, as much of the excess epoxy is squeegeed off so that the fiberglass is flat to the wood surface and not floating in a puddle of epoxy.  This can be a problem when sanding because if the glass is floating and you sand it flat, you can sand through a layer of glass creating a weak spot.  Also the sides of the canoe are steep and the epoxy runs like mad, so squeegee the heck out of it, just be careful not to make runs in the fabric or pull it up in the center of the hull.

The pic below is with the lights in the shop on:
 I apologize about the blurry pics.  That is from my hands shaking while taking the pic.
 This pic is with the lights in the shop turned off.  Look at that colour!  So nice!
Now I am out there hitting the outgassing bubbles with a brush because as the epoxy sets it heats up.  When it heats up it pushes out gasses, but they can't go out the other side because the other side has hardened epoxy already on it so it comes out the side we just epoxied.

When my dad gets back from his appt. we will squeegee on a second coat and be done with the epoxy for a few days to let it set and we can get started on the gunwales and decking.  The second coat fills in all the areas in the weave of the fabric and hopefully some gaps under the fabric as there are a few.  For a smooth finish you do a third (hot) coat but that adds weight and we want a slightly rough finish from the fabric anyway as a non-slip aid.  Besides, after the gunwales go on, it will be varnished and really "POP"!

AND the pics after the second coat in which I could not decide which was better, non-flash or flash: