Sunday, August 22, 2010

Deck glued ON!

My pop checking out one of the cracks in the deck. He helped me in a time of crisis! We were clamping her up and SNAP! Three times! I almost freaked, but calm and cool Cork kept me sain and glamped up the splits for me.

I didn't document the whole process with the camera, but I will try and write what we did.

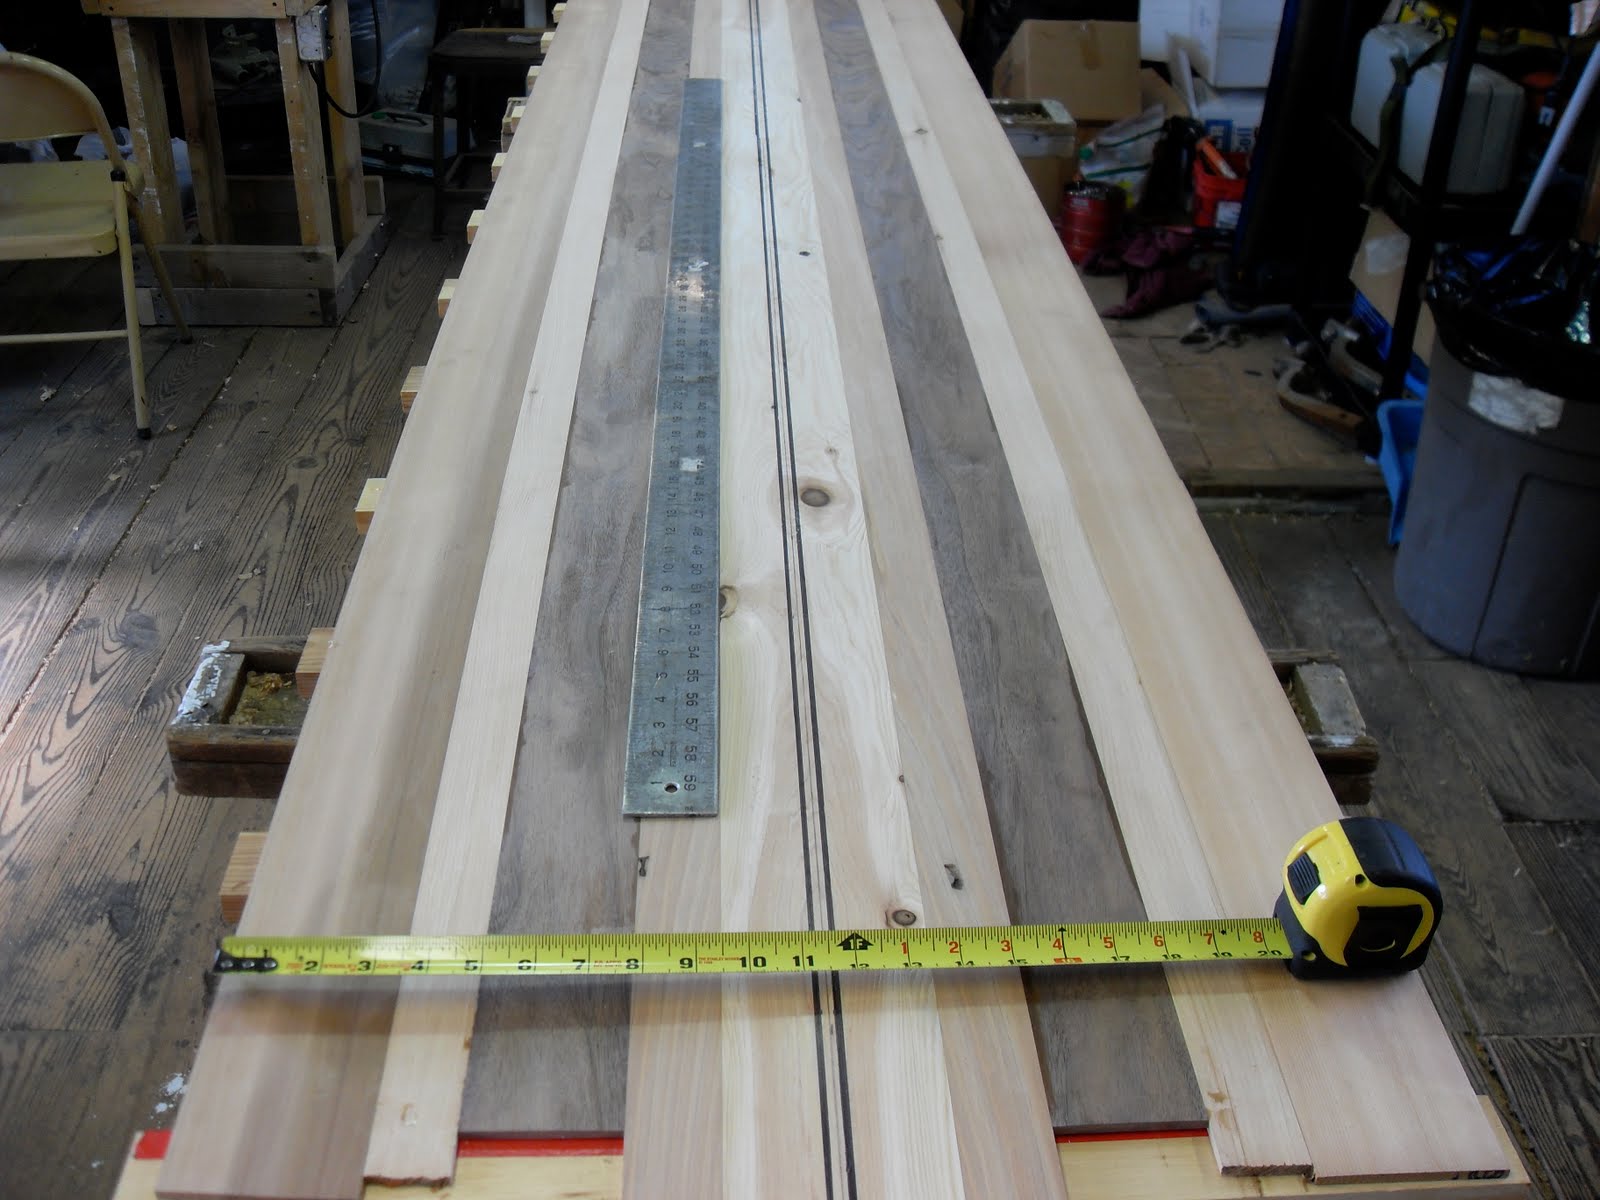
First on the bottom side of the deck I drew the centerline for the keel and where the frames would be. I would put any extra 5200 caulk on these lines. It took the keel and 3 frames fore and aft until it ran out.

Then the frames on the board itself were caulked with 5200, extra on deck, and the rails got painted with Titebond III and a 1 inch chip brush (project in total took over 32 0z. titebond). The deck was alingned with centerline and the fore and aft markings I had made and placed gently on top of the frames. 
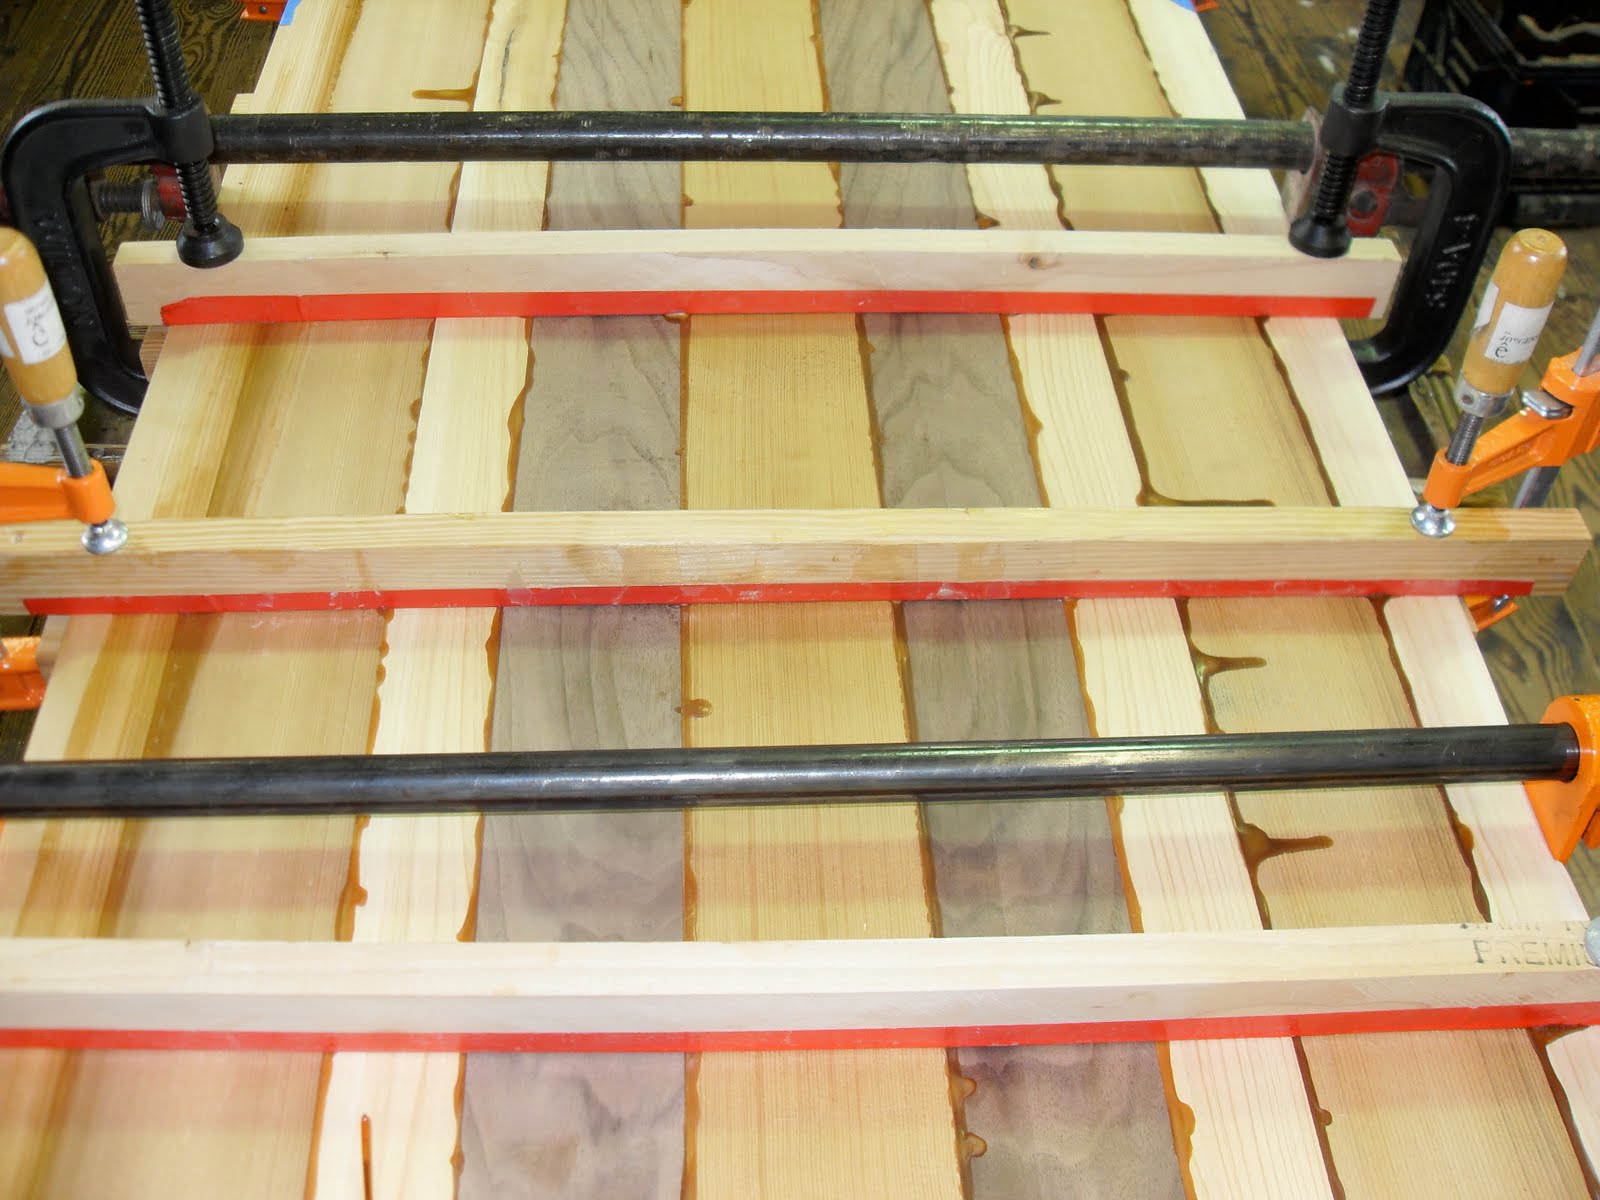
Then the invaluable Courtland Null and I ran battens across at each station and clamped them down on either side starting in the middle and working aft. Then we worked forward. I'm wondering if a different sequence would have been better to avoid the deck splitting at the nose. Not sure.

We also had to put wedges in some of the battens to get the deck tight to the glue. It was weird this go around. This may have been a result of my initial thickness planing and hand planing a small concave in the bottom of the deck. The splitting as well. I just hope that the deck isn't too lumpy as it's pretty thin to start with.

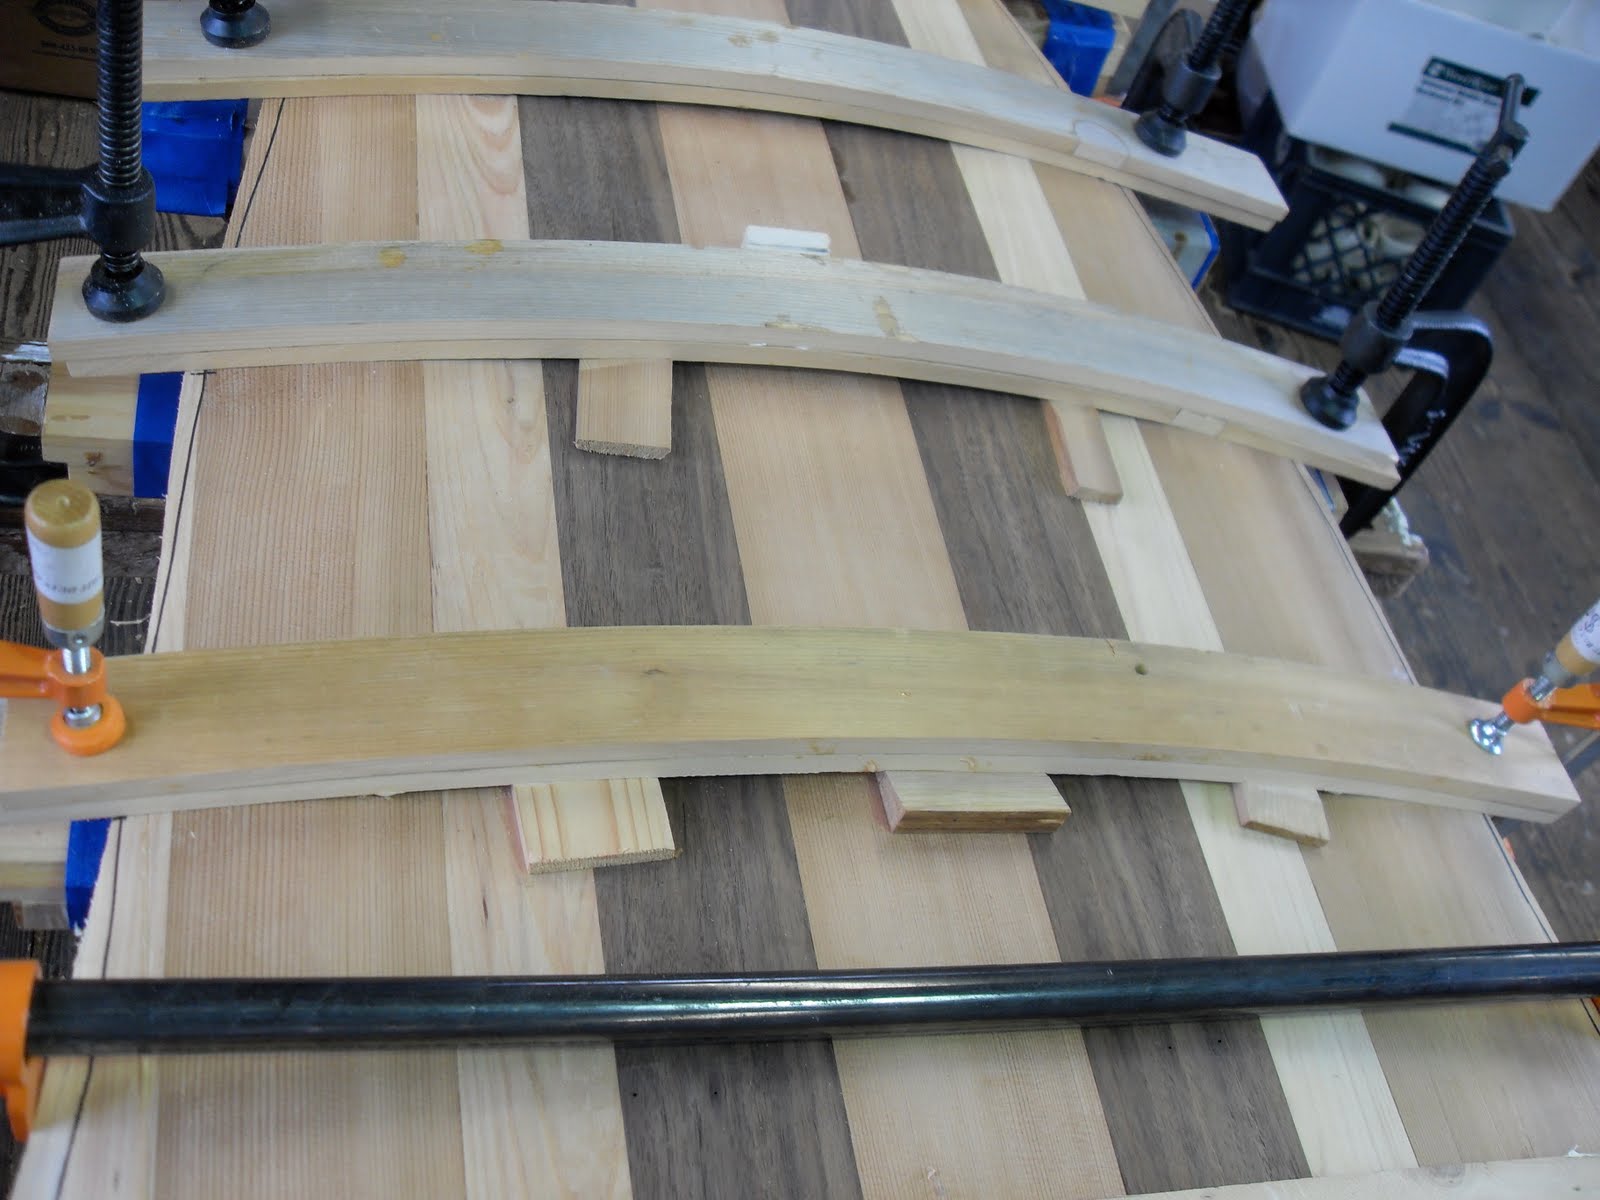
The worst split in the nose. This one will be noticeable. The others are far enough out on the rails where they will be sanded off. I couldn't tighten this split up either because of all the bends the wood is taking. I pushed it as it was. The eastern white cedar is definately softer than its western counterpart and is fine in the center but at the rails, it's no good. The grain is too wide. Also I paired it up with the Walnut which is super tough and something to think about in the future.


Note making in my boat notes book. Later reference is always good. Joe Gass took this pic just as he was on his way out to Hawaii. I hope he sells my boards to the locals. LOL LMAO


"the Wormhole" all clamped up.

Gluing in Fin Blocks and Valve blocks

Howdy folks, if there is any.

This is a valve block epoxied in up at the nose of the board. Other folks put them in down by the tail opposite the leash plug box, but being that the tail will be under water 90% of the time I feel it better for it to be out of the water. I have the spot measured from the nose and will bore a hole into it and drop the valve into it after I glass the board. Notice it is slotted for air flow.

Here is a pic of the fin box and the leash plug box. They are basswood and donated to me by Greenlight Surf Supply. We all believe in recycling so Brian gave me his leftovers from stringer manufacturing and I am able to get some use out of some really fine wood. Thanks Greenlight Surf Supply's Brian Gagliana! The wood is really for support purposes. When the board is finished it will be flipped over and the area where the fin box goes will be routed out and the box dropped in.


Captain Black always helps me think.

Last of the Cove and Bead Rails

Oh yeah, this is the tailblock glued up. Not sure if I posted this yet. I wasn't sure if I was gonna use it, but after I sanded it on the belt sander, it looks pretty good. Pics to come.


These pictures are looking awefully familiar. LOL My home made clamps.


Cove and bead rails ready to be planed flat on top to receive the deck!

Tuesday, August 17, 2010

NOAA: Second Warmest July and Warmest Year-to-Date Global Temperature on Record

I calls 'em as I sees 'em!

Here I fattened the tail by gradually raising the thickness of the keel and the three last frames buy gluing on a thicker keel and steaming and gluing the sides of the frames to match the thickess of the raised keel. I did this so I can put a fin box further back on the tail than the board was originally designed for. My intention is to really curve the rails near the tail and move the fin further back on this board for nose riding. I hope it works!


A different view of the modifications that I made to the design. I made the tail 3/8" thicker.


While glue was drying on a cove and bead rail and the modification I decided to manipulate some more wood by removing a few edges of the inside cove side of the strips so I can get a tighter fit to the frames. It worked well. After the few initial strips, I was able to just mark where the frames were on the strip and notch out the inside cove. Fits nice and snug that way. Adds time to the process though. To do one strip on each side is taking over an hour this way. I also am applying glue with a brush to the bead side which also adds more time to the process, but I want a good seal. I wanna fill gaps.

Bed time!

Full Moon, will be at 1:04 PM Aug 24, 2010

Moon is Waxing right now.

The next morning it was 72 degrees in the shop. There was plenty of time for my brother Keith and I to glue and set the frame in place. It was totally the right thing to do to wait for better temps AND to have a helper! I didn't have the camera with me to get a pic of Keith, but it was a really big help having him to lend a hand with getting those clamps set.

I don't know why those pics are side by side, but oh well.

Left one is just me fiddling.

Right one is me whittling! I had to carve a few of the longer (10') cove and bead strips by hand. I haven't gotten my bits for the shaper in the mail yet. Luckily I won't have to make any more. These were strips given to my by Geoff Mckonly. Leftovers from a class he taught. What sucked was this strip I am working on snapped and I had to make it over 3 times. Some had knots in just the right place, some had rotten spots, and some were just not steamed right. I steamed them with my clothes iron from college. I think this is the first time that I ever used it! Not sure. I may have ironed a few shirts back then. Not anymore! T shirts don't need ironin'!

This is the jig I used to hold the steamed stips in place. I did two strips at a time facing opposite of each other so the bends would be for opposite sides of the board. Jig was another Geoff donation.


The Chine strip is the innermost strip. It's square and gives the board it's ultimate shape. Outside of the Chine strip is the first Bead strip with a flat bottom. This is the base for all the bead and cove strips that will form a curve over the frames for the rail of the board.

Bees Trap Deputy in Car for Three Hours

It's true! Someone said that they saw it on Fox (News).

Yo, it's been a while, my bad. Weather weirdness and tool delays Held me up a bit here and there.

If you can't see my pictures, try clicking on the empty box. My dad says he can only see an empty box but then he clicks on it and it comes up.

That first pic is just me drawing a 1/4 inch wide centerline where the keel of the inner frame will go. Drawing it out gave me time to think of a way to keep the keel from squirming around when clamping it like it loves to do. My solution was to put keys every 8inches in between the frames on either side of the keel line. Worked great!

Here I am cutting out the rough outline of the board with a $19.99 Skil Jigsaw. Bad Idea. It's so rough it breaks boards. I switched to my japanese saw before I did any damage.


The Keys. Not the ones in Florida. Would be nice to go fishin there. Bonefishin' with fly rods sounds like a good diversion.

These actually worked really well. I left them in place after gluing. I don't think they will snap off after being mucked with the 5200 caulk. If they do, mega maracas! New musical instrument/surfboard.


The frame setting in place ready to be glued.

This process was delayed a day due to the temperature of the shop being 90 degrees even with two air conditioners running. Dow 5200 only has a working time of 15 minutes at that temperature. no can do. The temperature would be in the 70's the next morning. It was a good idea to wait. See ya!

Wednesday, August 11, 2010

Wood Planing gives Blisters

Hello, the last two-three days I have planed the planks when I could. Went canoeing and to the beach as well so not much time was dedicated to planing. Which is actually a good thing because my hands were tired and needed a break in between each plank anyway. Plus there was the odd blister on my forefinger that was WEIRD! Each side took a good 1.5 to 2 hours to get the planks more level. I didn't think it would take so long, but I needed to get used to the hand planes anyway. I could see for production reasons that an electric plane would really come in handy for saving time. I'd have to learn how to use one of those better as well!


These are the chips from just one side. I really shaved some meat off of these planks. I'm sure I took an eighth of an inch off or more.

Time for gluing that frame. I'm gonna clean up and get everything ready for when my dad comes over to help me glue it up! See ya!

Saturday, August 7, 2010

Planking! "the Wormhole" round TWO

My Pop and I taped, glued, and clamped this puppy up last night. It took about two hours to do that and 8 0z. Titebond III. Pop showed me a trick leveling the planks. Even still, when I planed them for thickness, I didn't match the sizes exactly so I will be using a hand plane to get them even before gluing to the internal frame. That may prove to be time consuming. I wish I had a power hand plane! But I'm not real good at using one of those and might take too much off. I will stick to hand planing just yet.


The glued together planks from the day before. I'm letting the glue set really well before any planing takes place.


Removing tape on the edges on the bottom first.


Flipping it over and removing the tape from the taped surface. The process took 30 minutes or so.


THE internal frame from the Grain Surfboard Co. "root" kit. The nose section was broken off and I had to glue it. Looks like me, crooked broken nose. The last time I couldn't fit the peices together easily, this time they are too loose so I had to glue them and prop them up with battens and such.

Things are coming along and I should have this board ready for the boat show! *insert loud rebel yell here*

Planking! "the Wormhole"


I'm trying to figure out the pictures and captioning, please bear with me. Last nights fiasco turned awry. I just left it. Whatevers...
I'm a day behind my Facebook (Wissinoming Brewing) posts.
The first step: Gluing the individual planks together forming the Deck. First the battens (wood strips) are laid overtop the planks setting on the rocker table (strongback it's called in boatbuilding). At alternate stations on the rocker table (look like the rungs on a ladder) the battens are laid across and lightly clamped and the ends. These hold the planks down while the bar clamps are pulling the planks close. All the seems get masking taped so glue doesn't fall out AND to hold the planks together while you are gluing. Not sure if I got pics of that step. I did on my last project if you scroll to March of 2007.


The planks are flipped over, tape side down, brought to the edge of the rocker table and each individual gap is glued. Then it is laid flat once again, battens laid down at stations, and bar clamps squeeze them together. I have 9 or ten bar clamps on this baby with about 12 battens. At this stage I was pressing the planks that floated out of place a little and it didn't work great. On the hull my Dad showed me to hit them in place with a hammer and a block of wood which worked much better indeed!

Plank Selection for the hull. Really nice grains in that Walnut!


Clamping and gluing the keel of the inner frame together.

Friday, August 6, 2010

"The Wormhole" project


Ah the fruits of the labors of the cast and crew of "The Wormhole" Project.
These planks are 1/4" thick and milled here at Benner Street on a Rigid 4330 thickess planer and an old Craftsman jointer. I was able to get four 1/4" x 3.5" Eastern Black Walnut planks out of a 4/4 x 7 plank because my dad took it into work and had his buddy saw it up on a 12" saw between two fences. NICE! Wood from center outward; W. Red Cedar, E. Black Walnut, E. White Cedar, W. Red Cedar, and then on the outermost rail Eastern White Cedar complete with a series of hollows from a grub that I found eating it!

This is my apprentice Laura. A very attentive learner and genuinely interested in woodworking. She will be helping me off and on with this project as well as the canoe to be started next month.


This is my Pop. The brains of the operation. I'm his apprentice! If it wasn't for his support I wouldn't be able to do any of this with him. This is quality time, even though I give him a load of sh!t here and there. This time is golden. I'm learning a lot from this man!


And here I am messing about with the planer.


All is fun and games until Laura gets hit with an Eastern White Cedar knot! After that and blowing cedar boogers out her nose, we decided it best if she wore her safety gear! Ear plugs included! That planer makes beastly blood curdling noise!

A Short WTF before I begin again.

I have just finished my first blog about "The Wormhole" complete with pictures, hit preview, hit the back button and it was gone!

WTF???